
Obviously there are more detailed instructions on the Ubiquiti site but I just needed a trunk port and a few access ports on my Ubiquiti EdgeSwitch so this is a much for my own documentation as it is for you my valuable customers!
- Connect the Admin Computer to a switch port, then navigate to 192.168.1.2 in your web browser.
- Note: Make sure that PoE is disabled on this port prior to connecting your device.
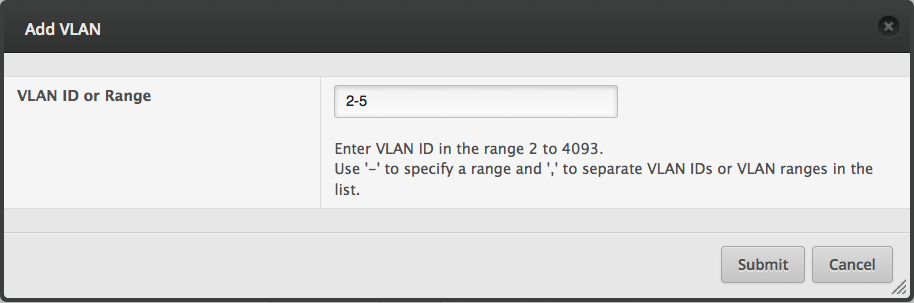
- Under Switching > VLAN > Status, click Add the vlan to the the EdgeSwitch. You can also add several vlans at once using a range like this:
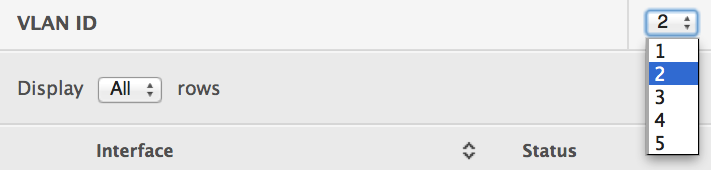
4. Assuming I want port 1 to be a trunk port, while still under Switching > VLAN > Port Configuration, select 2 from the dropdown menu for VLAN ID.
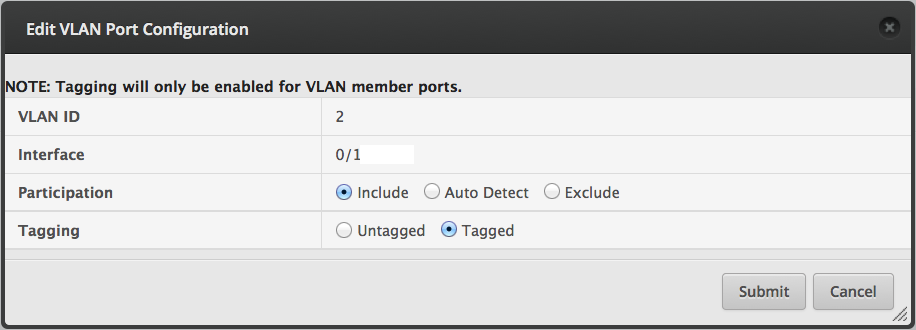
5. Then select Ports 0/1 (the trunk port) and apply the following configuration:
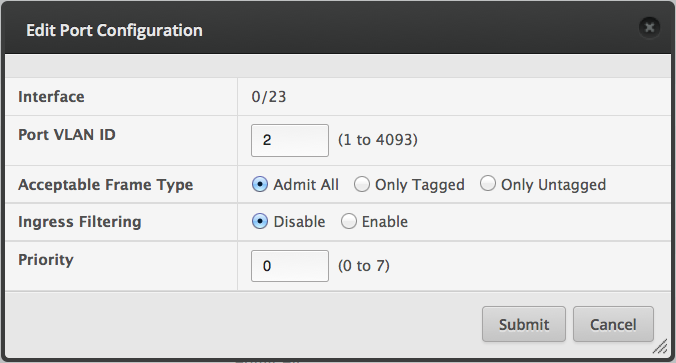
6. Then select Port 0/23 (the access port for UVC belonging to VLAN2) and apply the following configuration:
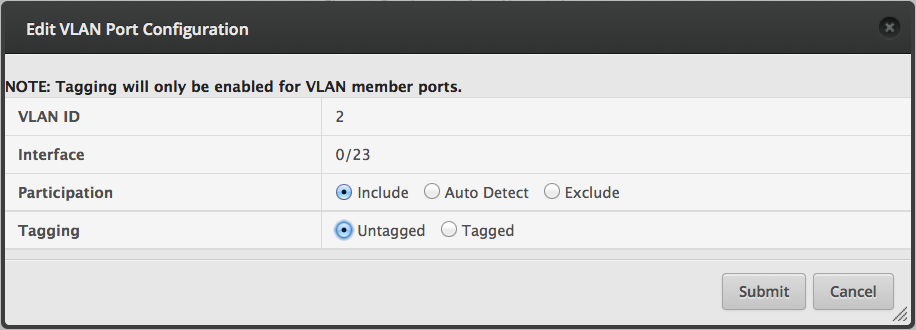
7. Next, navigate to Switching > VLAN > Port Summary, select All from the Display rows dropdown menu. Then select Port 0/23, click Edit, then apply the following configuration:
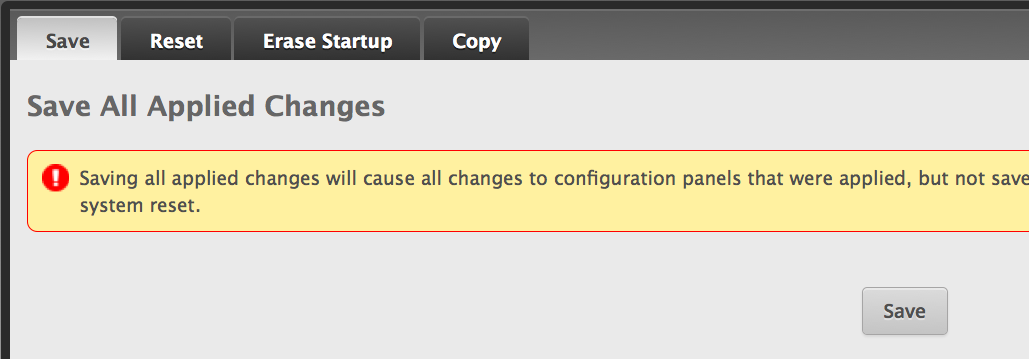
8. Finally, click the Save Configuration button at the top-right of the screen to apply the active configuration to the boot configuration, then follow the prompts that appear.

 That’s it!