First SAF Freemile Deployment

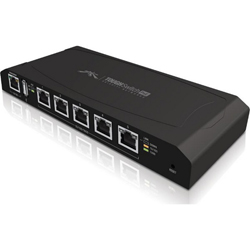
We completed our own deployment of the SAF Tehnika FREEMILE-24-2 system today after selling several units to customers with good acceptance.  I have been certified on the SAF proeucts for a year or so and this was an opportunity for me to see it perform in the real world.

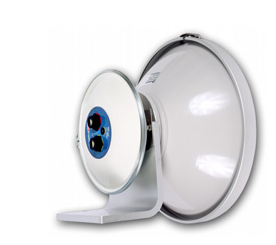
The quality of the workmanship is excellent.  Pieces are well machined and well finished.  The Arkivator dish antennas are also well made and have an extremely tight pattern and good front to back ratio.  At 24 GHz, the fresnel zone is small and the beam width of the antennas is very tight so proper alignment is a must.

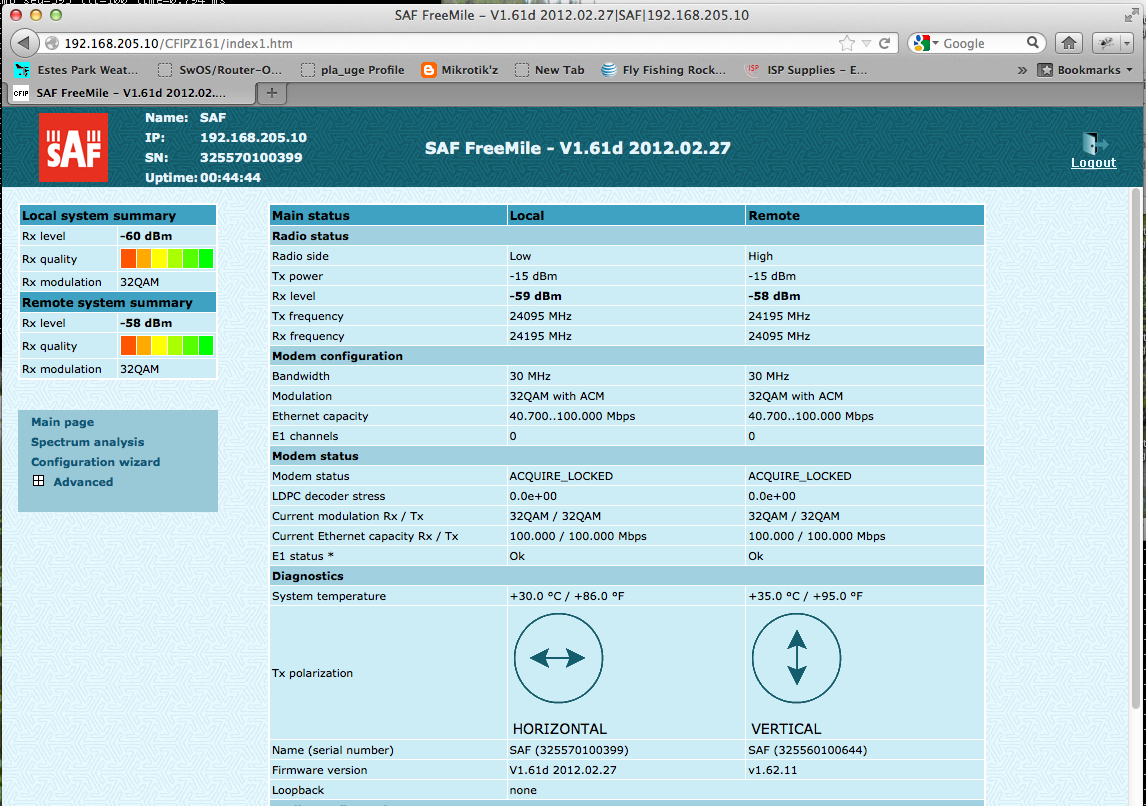
The link was a bit over a mile, not too far and we were able to align it perfectly resulting in a -59 dBm receive strength, 32 QAM modulation and 100 mbps throughput both directions.  Latency was about 1 ms.  We used 2 ft dish antennas because we were concerned about rain fade and wanted sufficient link margin for 99.999% up-time.

The setup script was easy and only 4 steps long and I had a working link, very intuitive.  You don’t have to be SAF certified to understand the interface, again, very intuitive.  You have a choice of three channels and the ability to do a frequency scan.  Also, changes made to the config can be copied to the remote end with a single button click.

While there are other 24 GHz products out there like the Ubiquiti airFiber that may give more throughput, this one is simple, robust, has the ability to use different antennas.  I will definitely push this product to our customers.

Trunk two RB250GS Switches Together

Scenario: You have one MikroTik  RB250GS switch running 802.1Q vlans and you want to extend all or some of those vlans to a second switch. The following diagram borrowed from a post by Ozelo explains:

OverallDiagram.png

The configuration of the first switch (192.168.88.1) is explained in a previous example 802.1Q Router on a Stick Example. The main change to that example is the configuration of port ether5 since we want it to pass all the vlans to the second switch. The two pales you need to make changes are the VLAN tab and the VLANs tab. Confusing, yes but note the “s” on VLAN on one tab.
Configure the first switch as follows:

Switch 1 – VLAN Tab
 

Switch1-1.png

Switch 1 – VLANs Tab
 

Switch1-2.png

Then configure the second switch as follows. Please note we have set the IP address of the second switch to 192.168.88.10 so as not to duplicate the witch 1 IP address. This is done on the System tab. In case you ever wonder why there is no setting for netmask or default gateway, that is because the switch does a little magic in determining the source of the packet and returning it to the host without the need for those two pieces of information.

Switch 2 – VLAN Tab
 

Switch2-1.png

Switch 2 – VLANs Tab
 

Switch2-2.png

All that remains is to create the vlan interfaces on the router and assign IP addresses, DHCP server, etc. to them. Here is a screen shot of the router used for this example, interfaces and IP addresses. The IP here is the one being used to manage the switches:

Interfaces.png
 

That is it, you should now have two switches trunked together passing vlans to the second switch.

MikroTik RouterOS Version 6 Changes

Here is a list of some changes and improvements for RouterOS v6
• A new linux kernel is used (version 3.3.5) which enables us to use the latest drivers and support most of the latest hardware
• Simple queue mechanism is improved to greatly benefit setups with hundreds or thousands of Simple queue rules
• Simple queue performance on multicore systems is improved significantly
• Latest v6rc3 adds more Simple queue optimizations, Packet flow is slightly changed as you can see in the diagram below
• v6 also features fastpath feature – a mechanism of packet flow shortcuts to massively improve data throughput, currently this feature is added to simple setups, like routing, bridging and mpls, but in future we plan to enable fast path for more complex features, such as Firewall
• Fastpath is also supported for MPLS traffic since RouterOS v6rc3
• RouterOS is now made 64bit for TILE architecture, that is used on our new Cloud Core Router devices (see article on page 1), giving ability to use 16GB of RAM or more
Hidden Feature – Cable Diagnostics
The ability to detect cable problems has now been added in RouterOS v6rc3 and newer releases.
RouterOS will tell you:
    • Which cable pair is broken
    • At what length the cable is broken
    • How the cable is broken – torn or shorted
    
This works on SXT-G, RB711G, RB2011, RB750 series and other devices with the same switch chips, and also the new Cloud Core series devices.
Check us out at www.ispsupplies.com for all of your MikroTik needs!
    

Cloudcore Pricing Announced!

After much anticipation, we finally have pricing for the MikroTik Cloud Core!  
CCR1036-12G-4S
Cloud Core Router 1036 with Tilera 1.2Ghz 36-core CPU, 4GB RAM (2x2GB), 4xSFP, 12xGbit Ethernet, RouterOS L6, 1U rackmount case with touchscreen LCD, power supply
List price $995
CCR1016-12G
Cloud Core Router 1016 with Tilera 1.2Ghz 16-core CPU, 2GB RAM (2x1GB), 12xGbit Ethernet, RouterOS L6, 1U rackmount case with touchscreen LCD, power supply
List price $645
CCR1016-12G-BU (without enclosure)
Cloud Core Router 1016 with Tilera 1.2Ghz 16-core CPU, 2GB RAM (2x1GB), 12xGbit Ethernet, RouterOS L6, touchscreen LCD, power supply
List price $625

MikroTIk advanced training this week, Houston, Texas

THis week ISP Supplies is conducting advanced training at LaQuinta Inn and Suites, Houston, Texas. Ready to dig deeper into MikroTik's routing capabilities? Ready to learn all the wireless feature set? Maybe you need to build an enterprise class firewall or implement OSPF in your network. If so, this class is for you! Check our schedule for the next MikroTik training class.